Balancy Adapter
Introduction
Balancy allows developers to:
- Change the behaviour and appearance of the game remotely and do A/B testing.
Install LionSDK
Complete the steps in Getting Started.
Install Balancy
- Go to Balancy Page here and follow
Plugin Installationpart only (skip everything else).
💡 | If you didn’t setup the game yourself on Balancy dashboard then ask your Lion point of contact to give you Email and Password for Balancy authorization. |
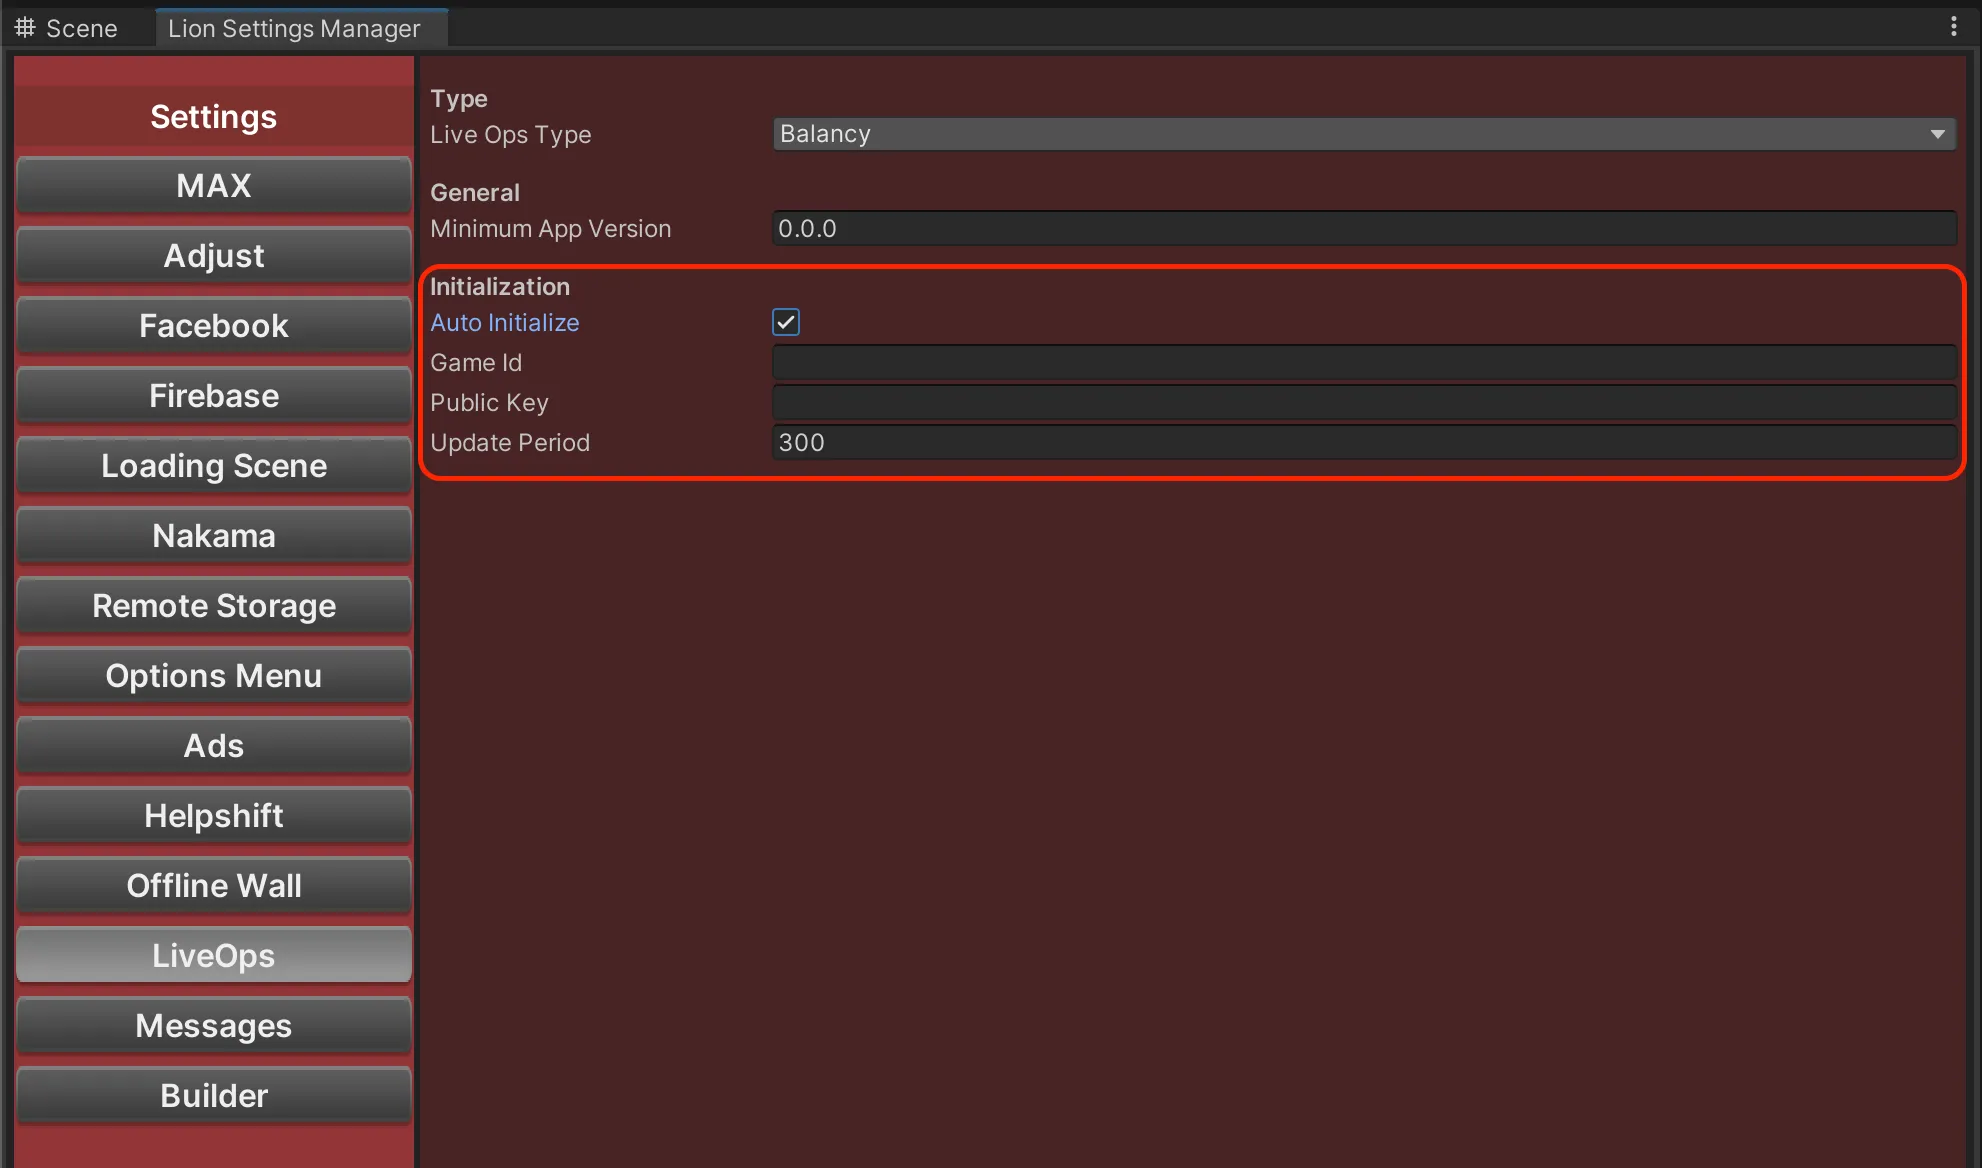
Setup
After installing Balancy SDK, open the LiveOps tab in LionStudios/Settings Manager. Select Balancy as LiveOpsType in LiveOps Settings tab.
To initialize balancy,
- Check on “Auto Initialize” checkbox.
- Enter the Game Id and Public Key of your game.
💡 | If you didn’t setup the game yourself on Balancy dashboard then ask your Lion point of contact to give you Game Id and Public Key for Balancy. |
Implementation
Follow Balancy Documentation to know about Templates, user-properties and A/B testing in Balancy.
Implementation on Balancy Side:
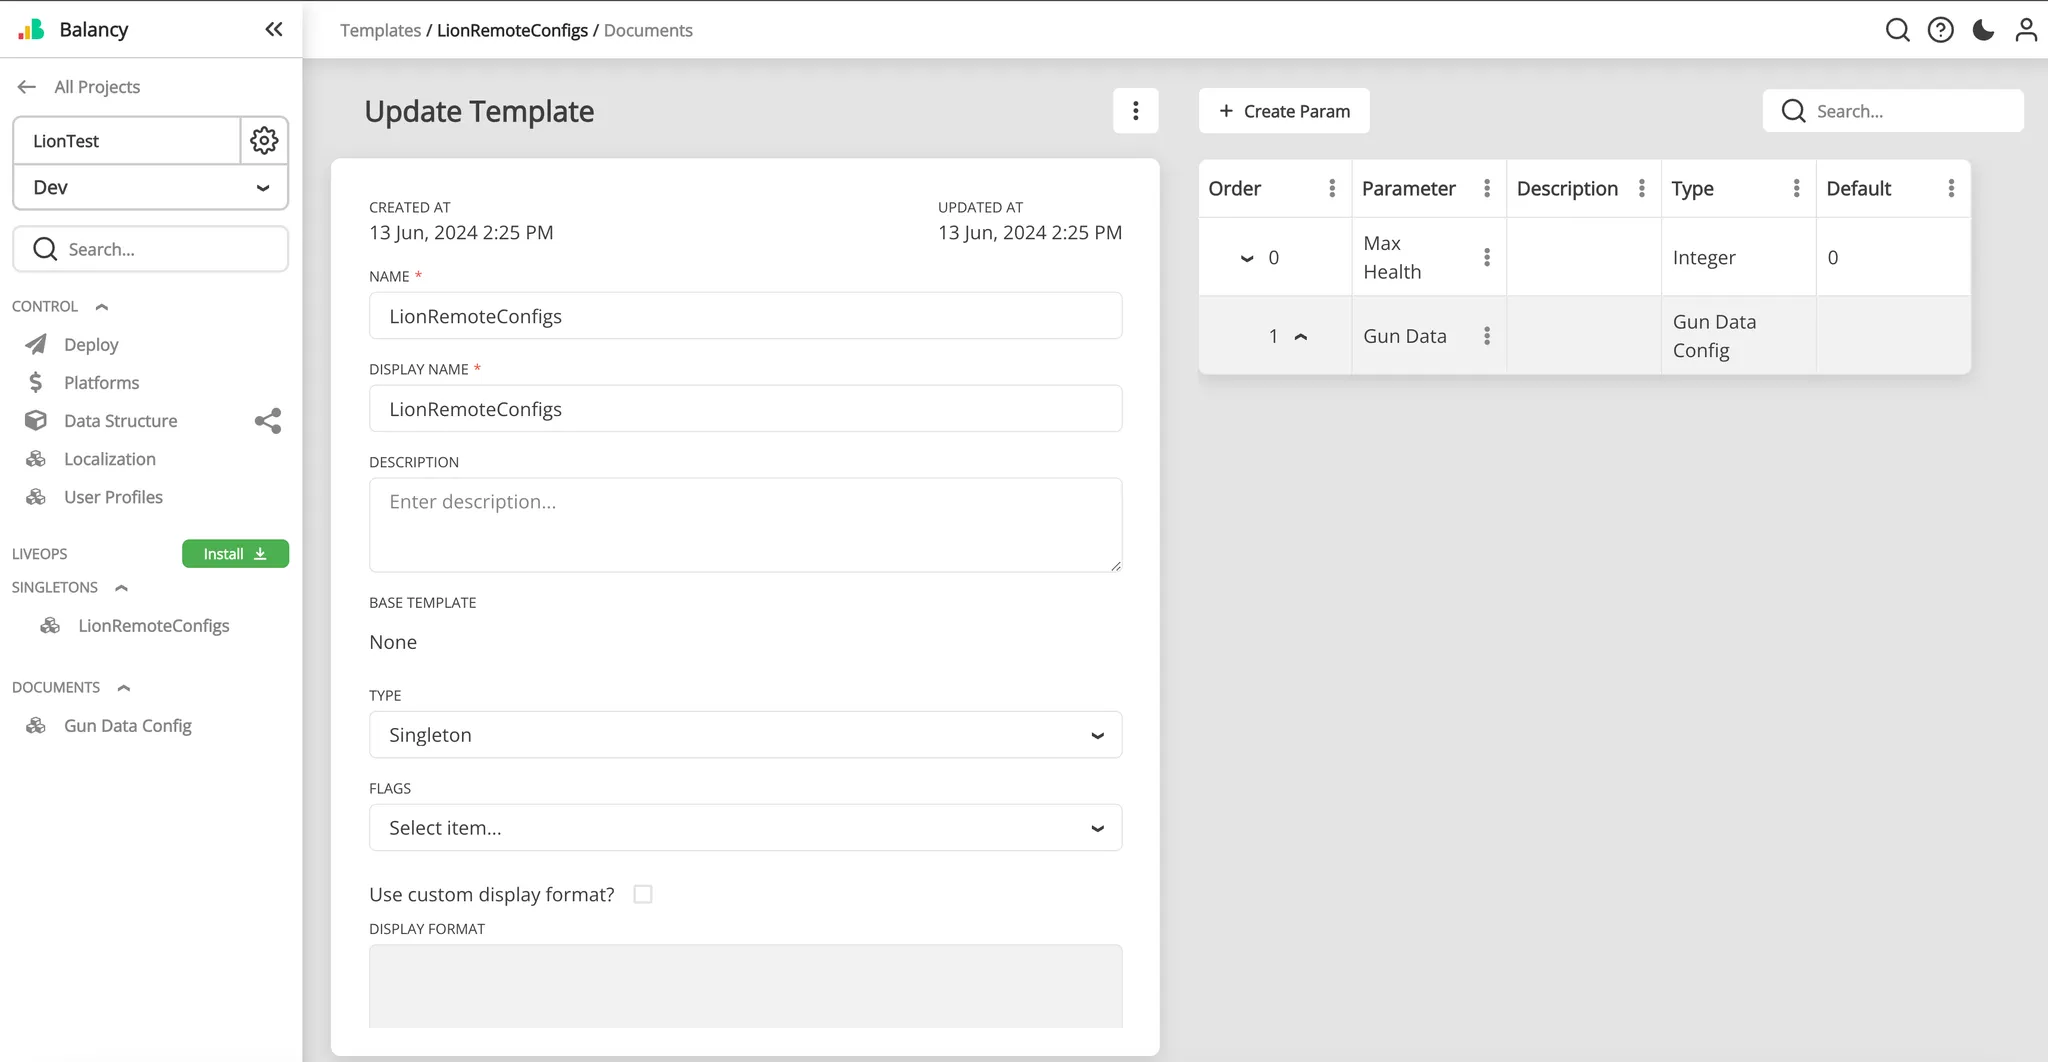
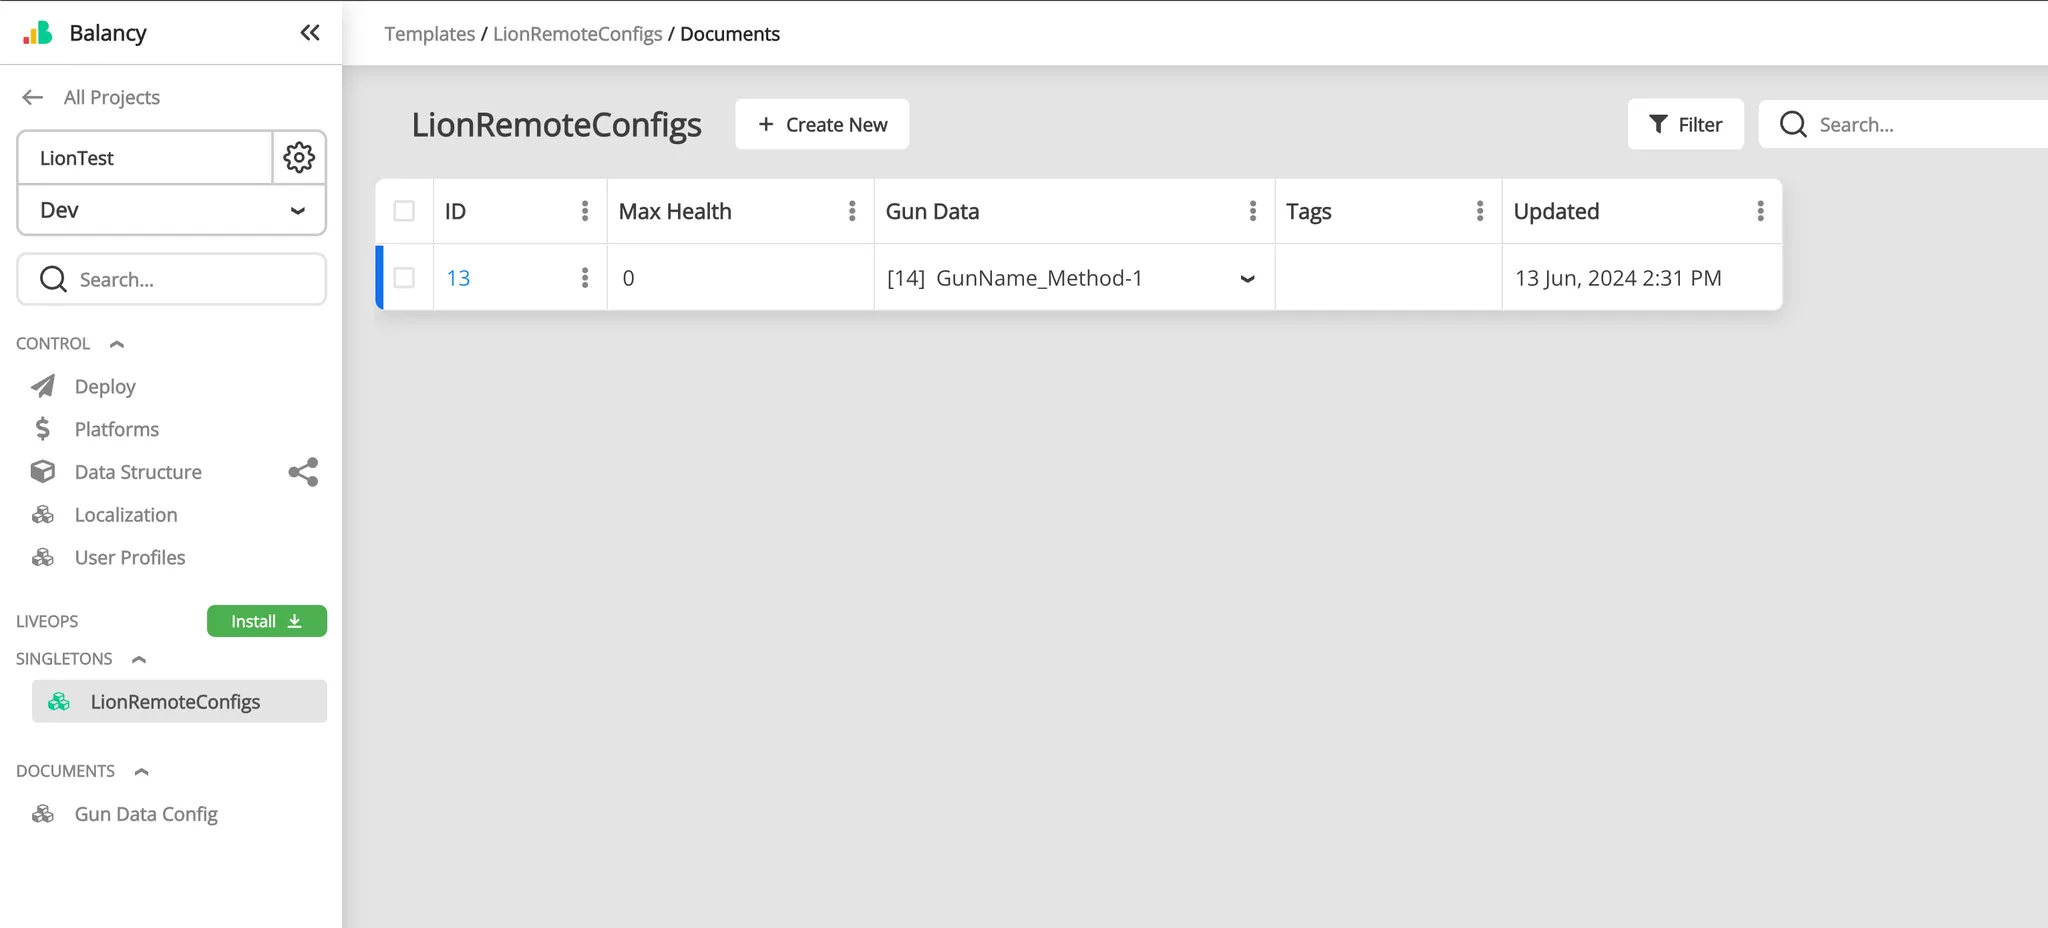
Go to Balancy your project. Under Control/Data Structure, create a new template with type “Singleton” and name it “LionRemoteConfigs” . Create parameters, each column (parameter) means new remote config.
Template-Example:
Data-Example:
Implementation on Unity side
Follow LiveOps “Usage” part which tells what type of functions are available.
⚠️ | Crucial step as required by Balancy: Remember to import Balancy code in Unity by going to Tools → Balancy → your account authorization → select your game → Generate Code. More information on this can be found here |
Example:
void Awake(){
		if (!LionCore.IsInitialized)
		{
				LionCore.OnInitialized += delegate
				{
						Debug.Log("Call LiveOps functions here");

						int health = LiveOpsController.GetValue("MaxHealth", -1);
						GunData gunData = LiveOpsController.
						GetValue("GunData", new GunData("MyGun", 5));
				};
		}
}
⚠️ | Don’t call LiveOps functions until Lion Core is initialized. |
✅ | LiveOps.SetUserProperty function will look into builtin user properties first. If no property with the given property name is found then the function will look into user/custom defined properties in all user profiles. To know more about user properties follow Balancy documentation. |
✅ | If you use a loading scene that waits for Lion Core to be initialized, then you can always call LiveOps (Balancy) code in the following scenes. See our provided Loading Scene: Loading Scene |